Exploring Yosemite Valley in 4 days

Be ready for daylong hikes (8-16 miles), lots of elevation gain (~950 m) and fantastic views from different angles of Yosemite valley! I did this trip in May 2019 right after Memorial Day weekend to avoid crowds.

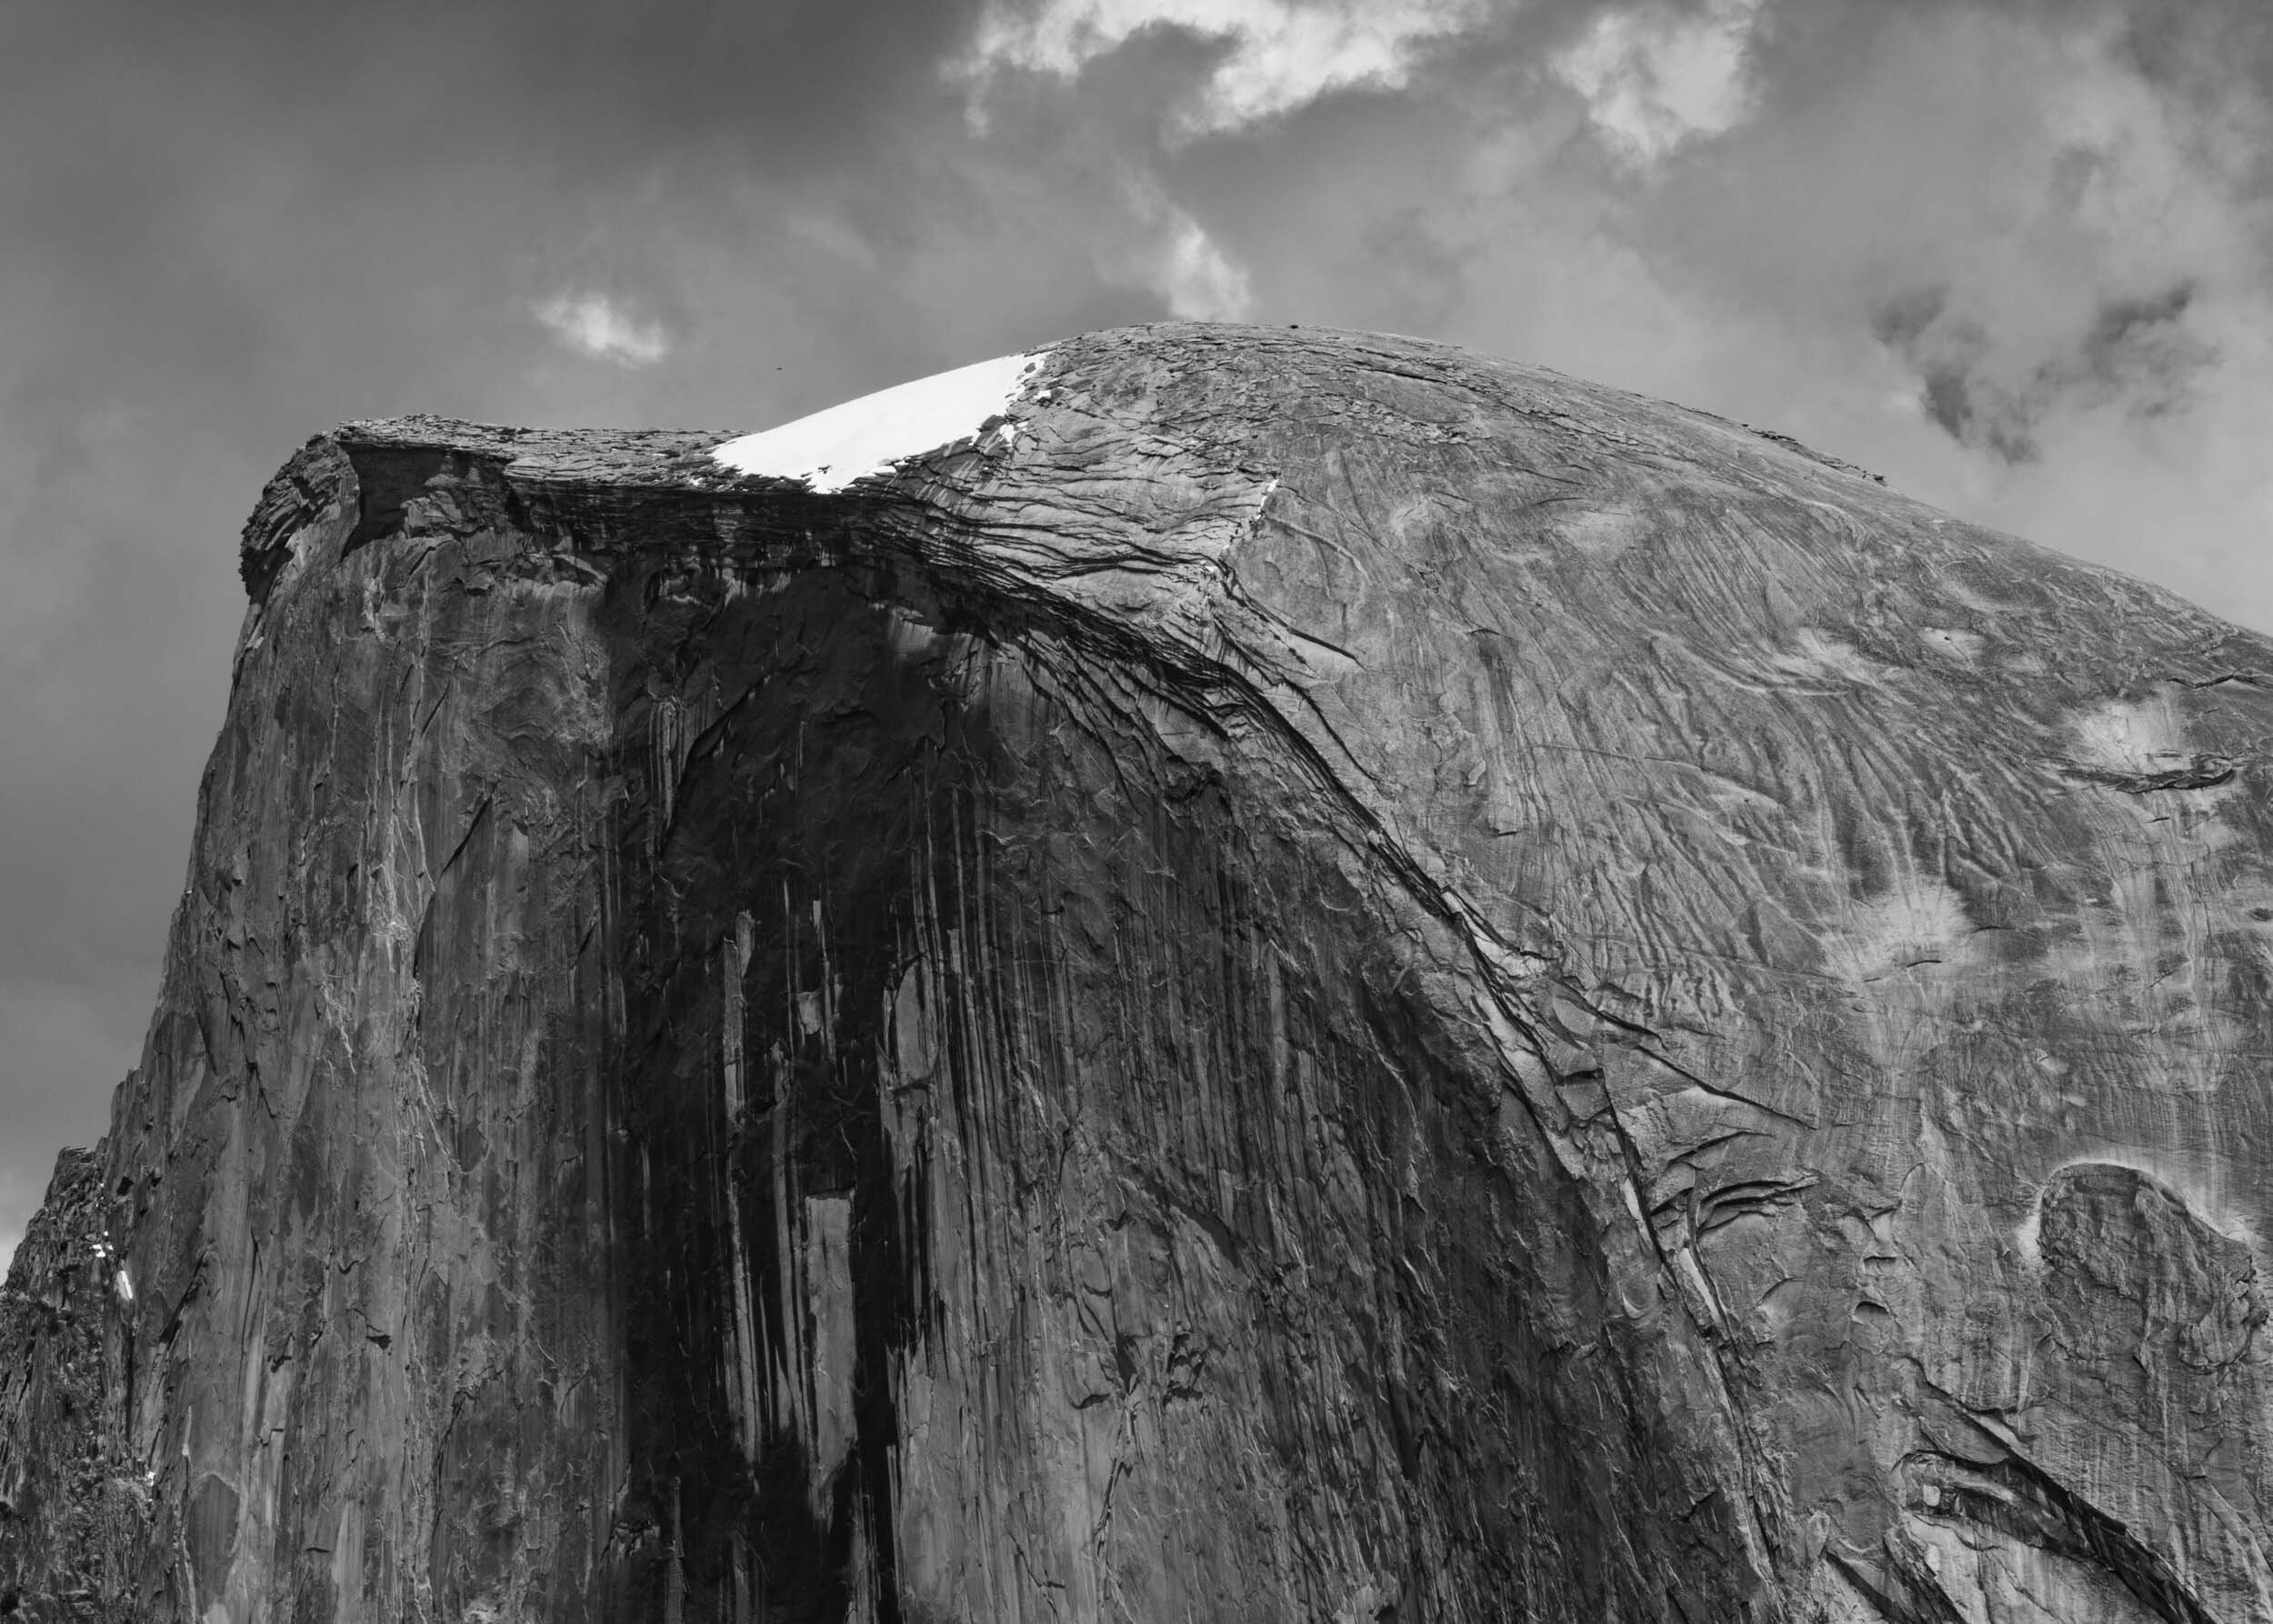
Every season is good for Yosemite, but during spring, just after Memorial Day weekend, the waterfalls are fully loaded with water and not many visitors go to the park during the week (which helps to find parking easily and not having people next to you all the time during the trails!). On the other hand, some parts on the highest areas are still covered with snow and the trail might not be visible, and there is usually chance of rain in the afternoon. Depending on how strong the winter was, many roads can still be under maintenance, in my case Tioga Road was closed and I couldn’t do the Cathedral Lakes hike which was very high on my list. Will have to include it the next time I go to Yosemite, and hike Half Dome which is also closed during winter and part of spring.

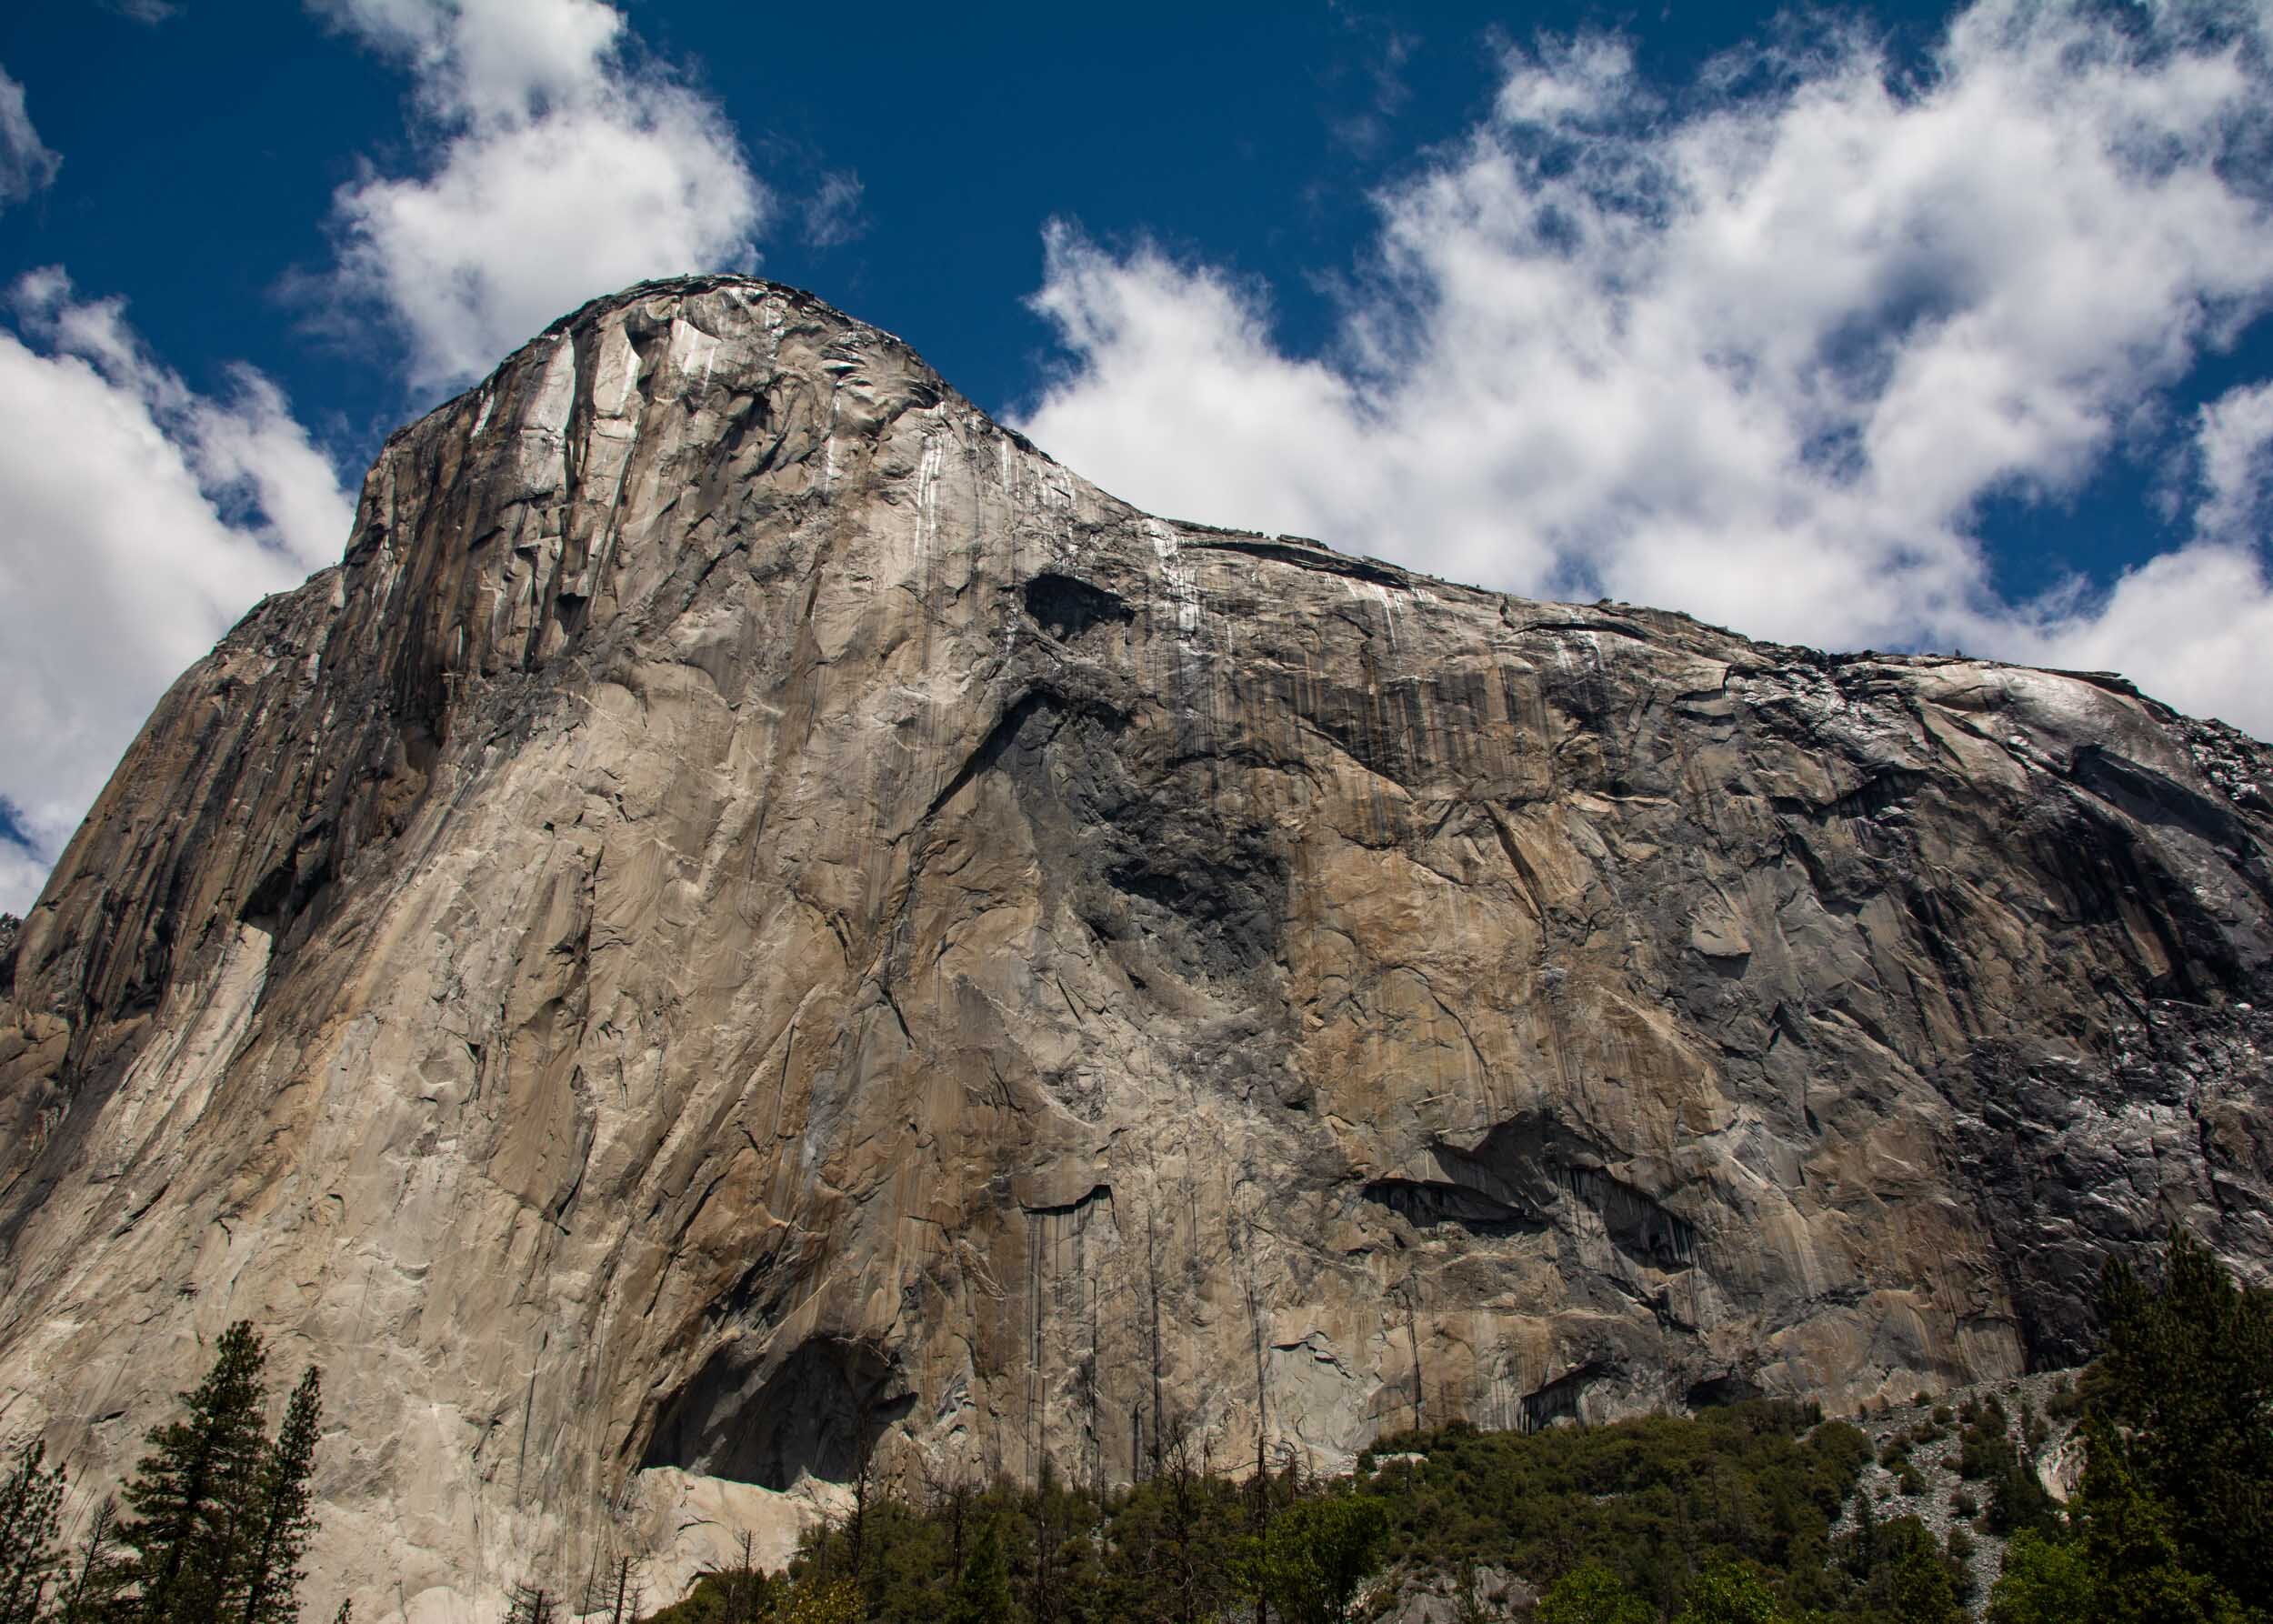
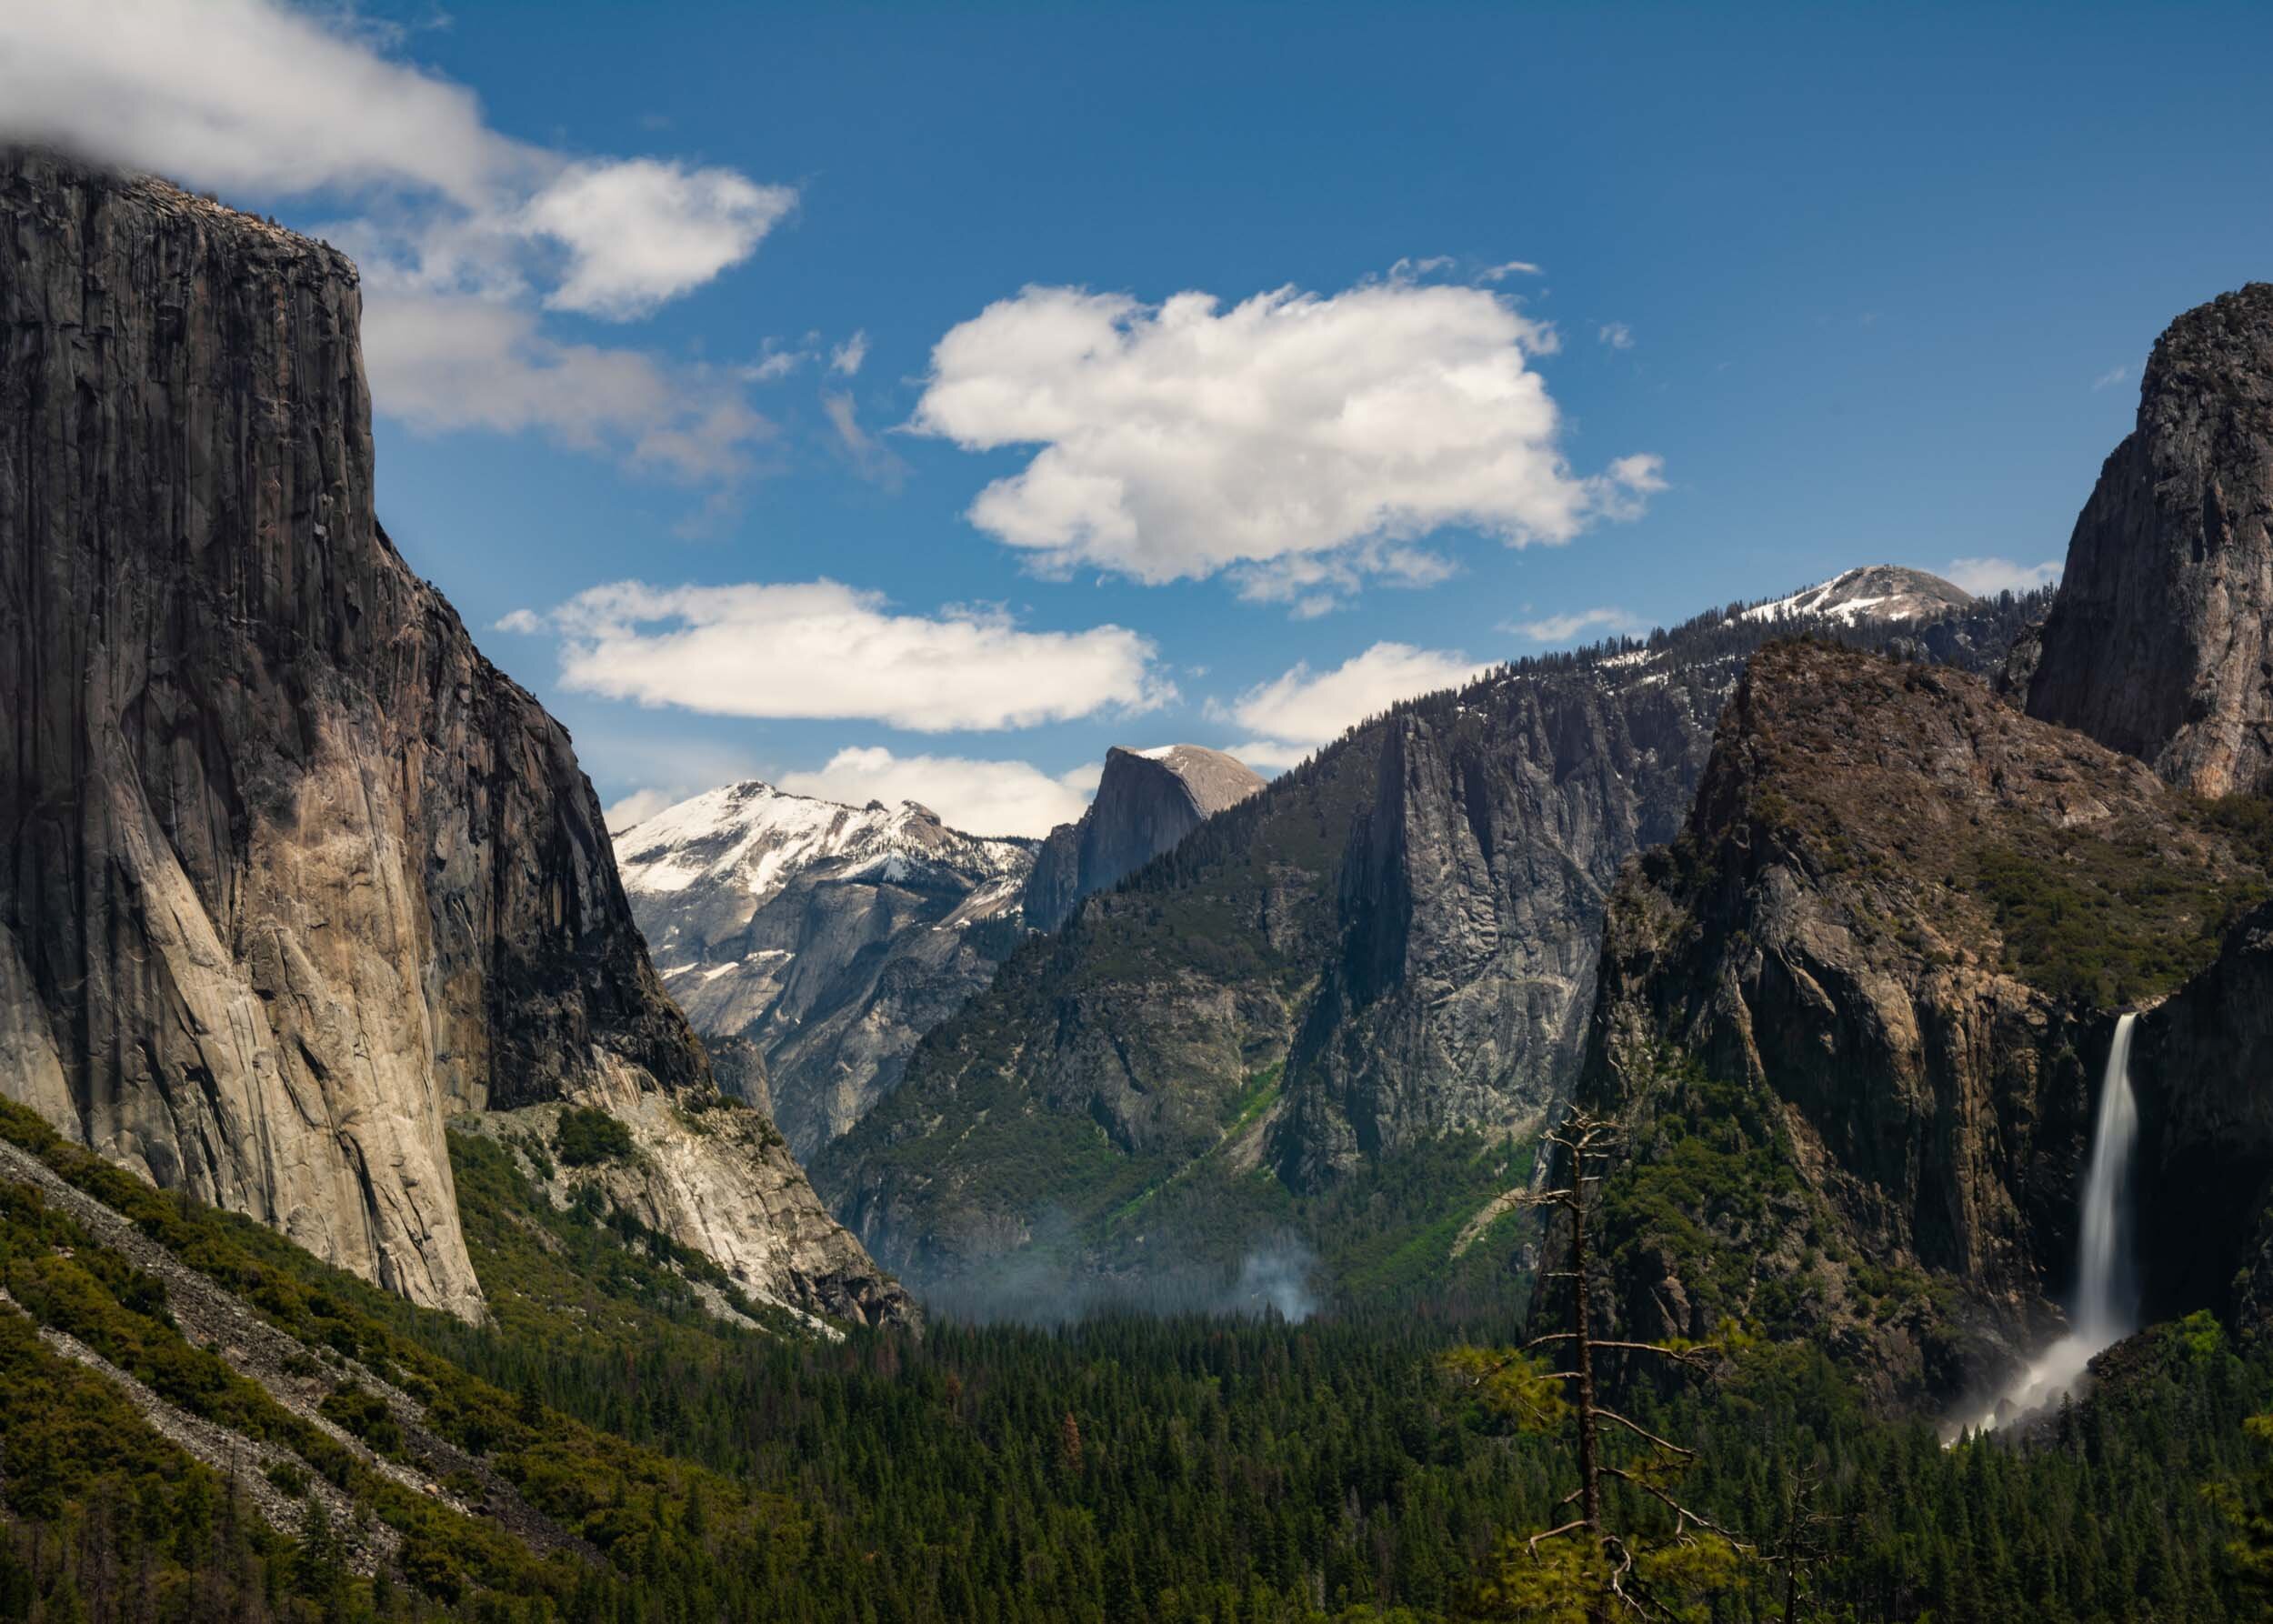
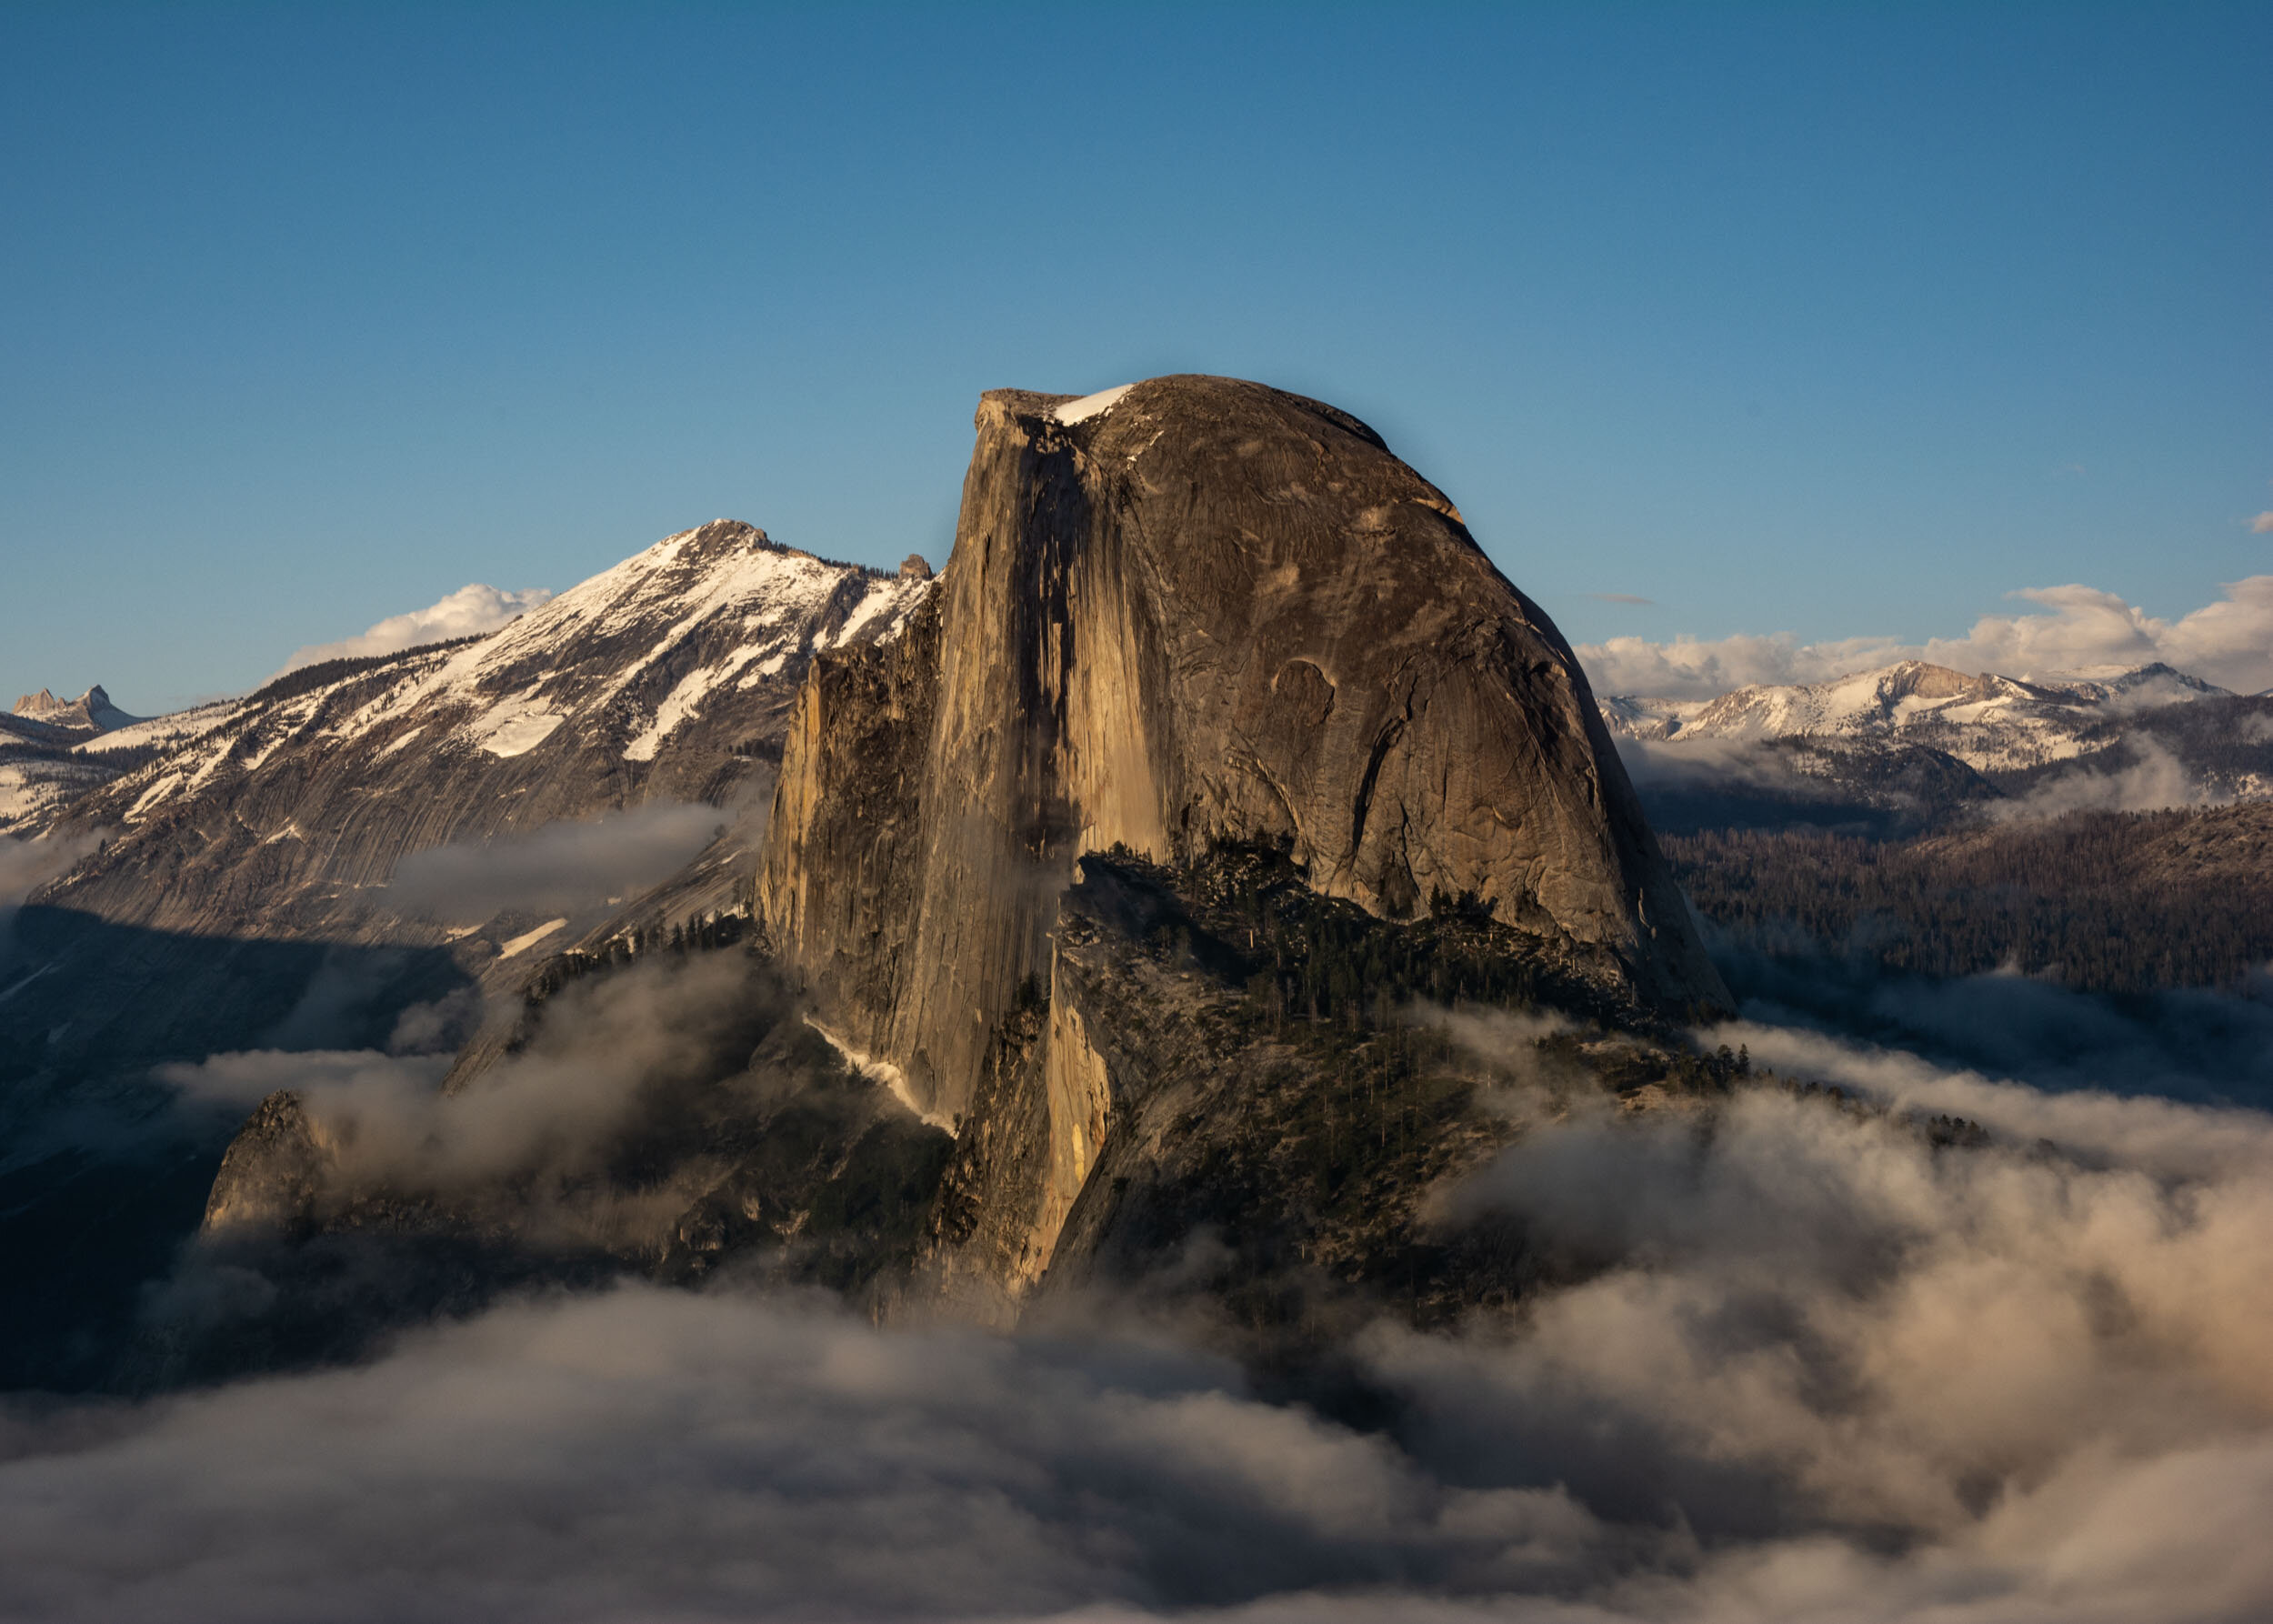
The drive from San Francisco is around 4 hours, I left early and got to Yosemite by noon, giving me enough time to explore the valley by car and stop at the scenic viewpoints. I drove up to Glacier Point (stopping at Tunnel View for another great viewpoint of the valley) to start the hike to Sentinel Dome & Taft’s Point (the Taft’s Point trailhead is on the way but I preferred to park in Glacier Point to secure a parking spot). They’re well connected and it’s a 7 mile hike with great panoramic views. Remember that the sun will set on the West so the afternoon is the best time for photos on this side of the valley. Make sure you’re back at Glacier Point before sunset for stunning photos of Half Dome!

On the second day, I had an early (9am) start to hike Upper Yosemite Falls and get to Yosemite Point for a different panoramic view of the valley. I knew I had to get to the peak after midday to have a good light. This hike (round trip) was 10 miles and has a steep elevation gain! Initially I wanted to start at the Old Big Oak Flat trailhead, hike up to El Capital, Eagle Peak, Yosemite Point and then head down via Upper Yosemite Falls (very log hike), but there was much snow accumulation and could have been dangerous. Even when I was at the top of the Upper Yosemite Falls there was much snow and it was impossible to find the trail to Eagle Peak. This is all for day two!

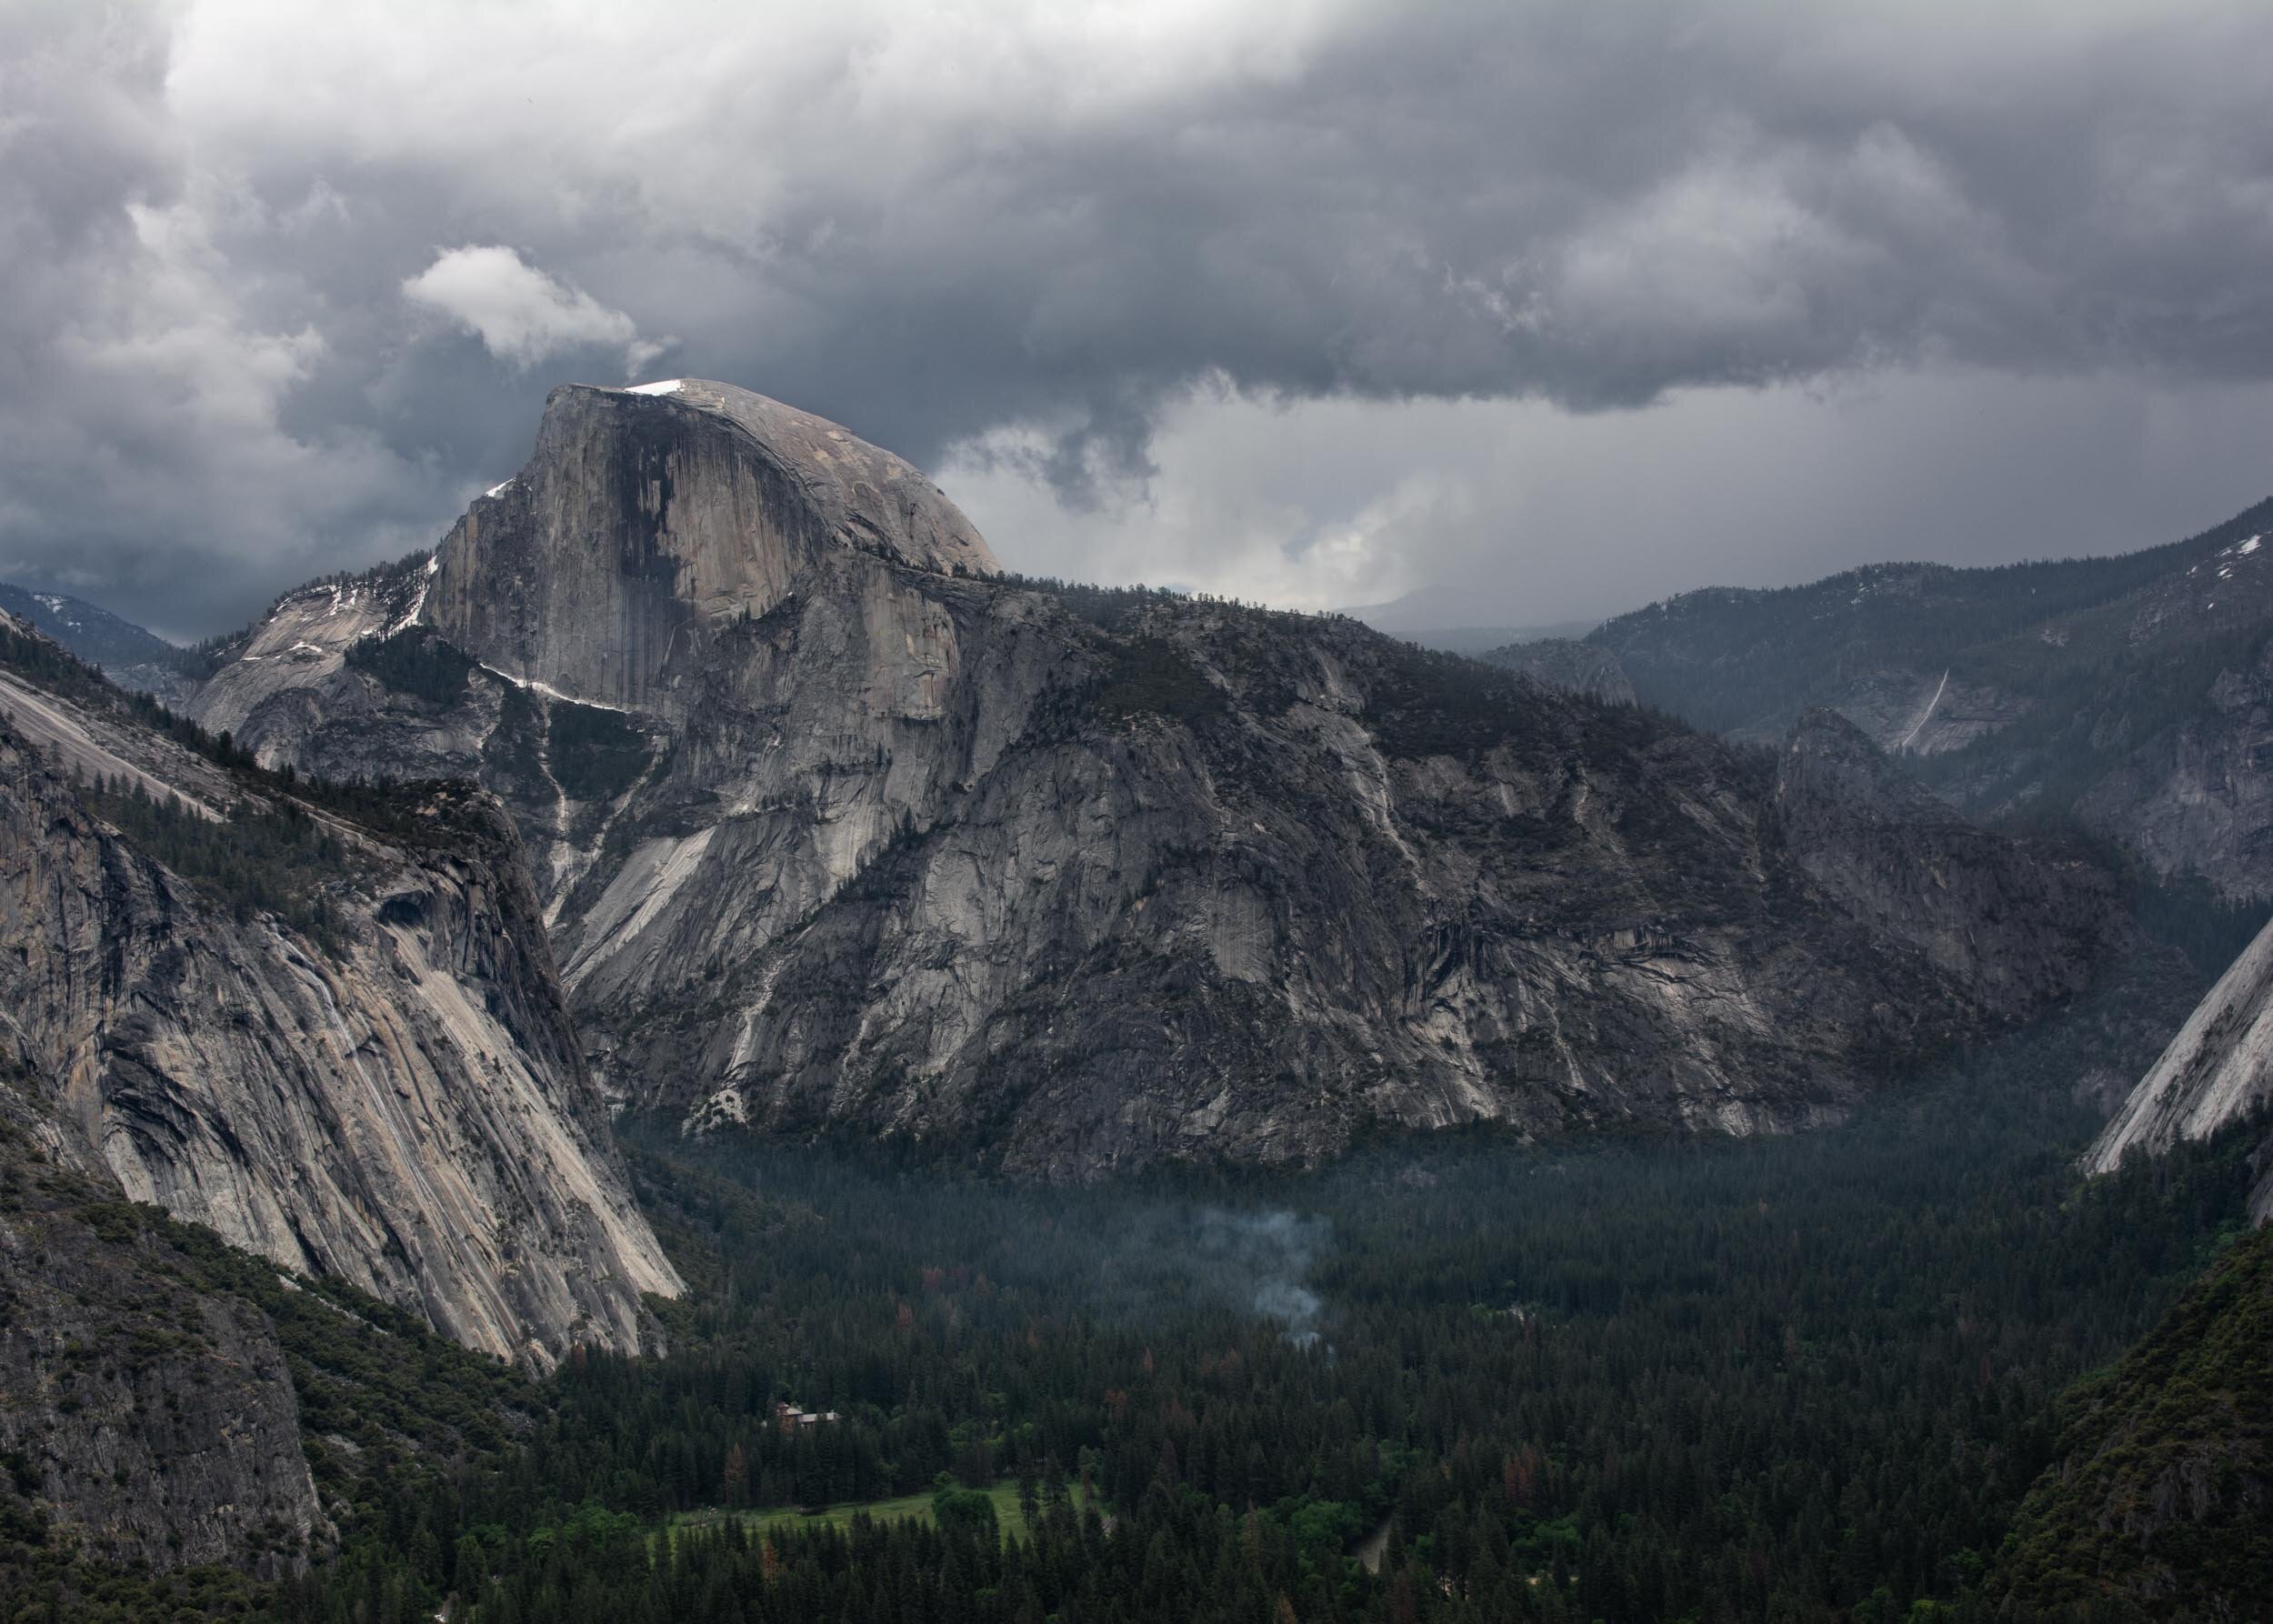
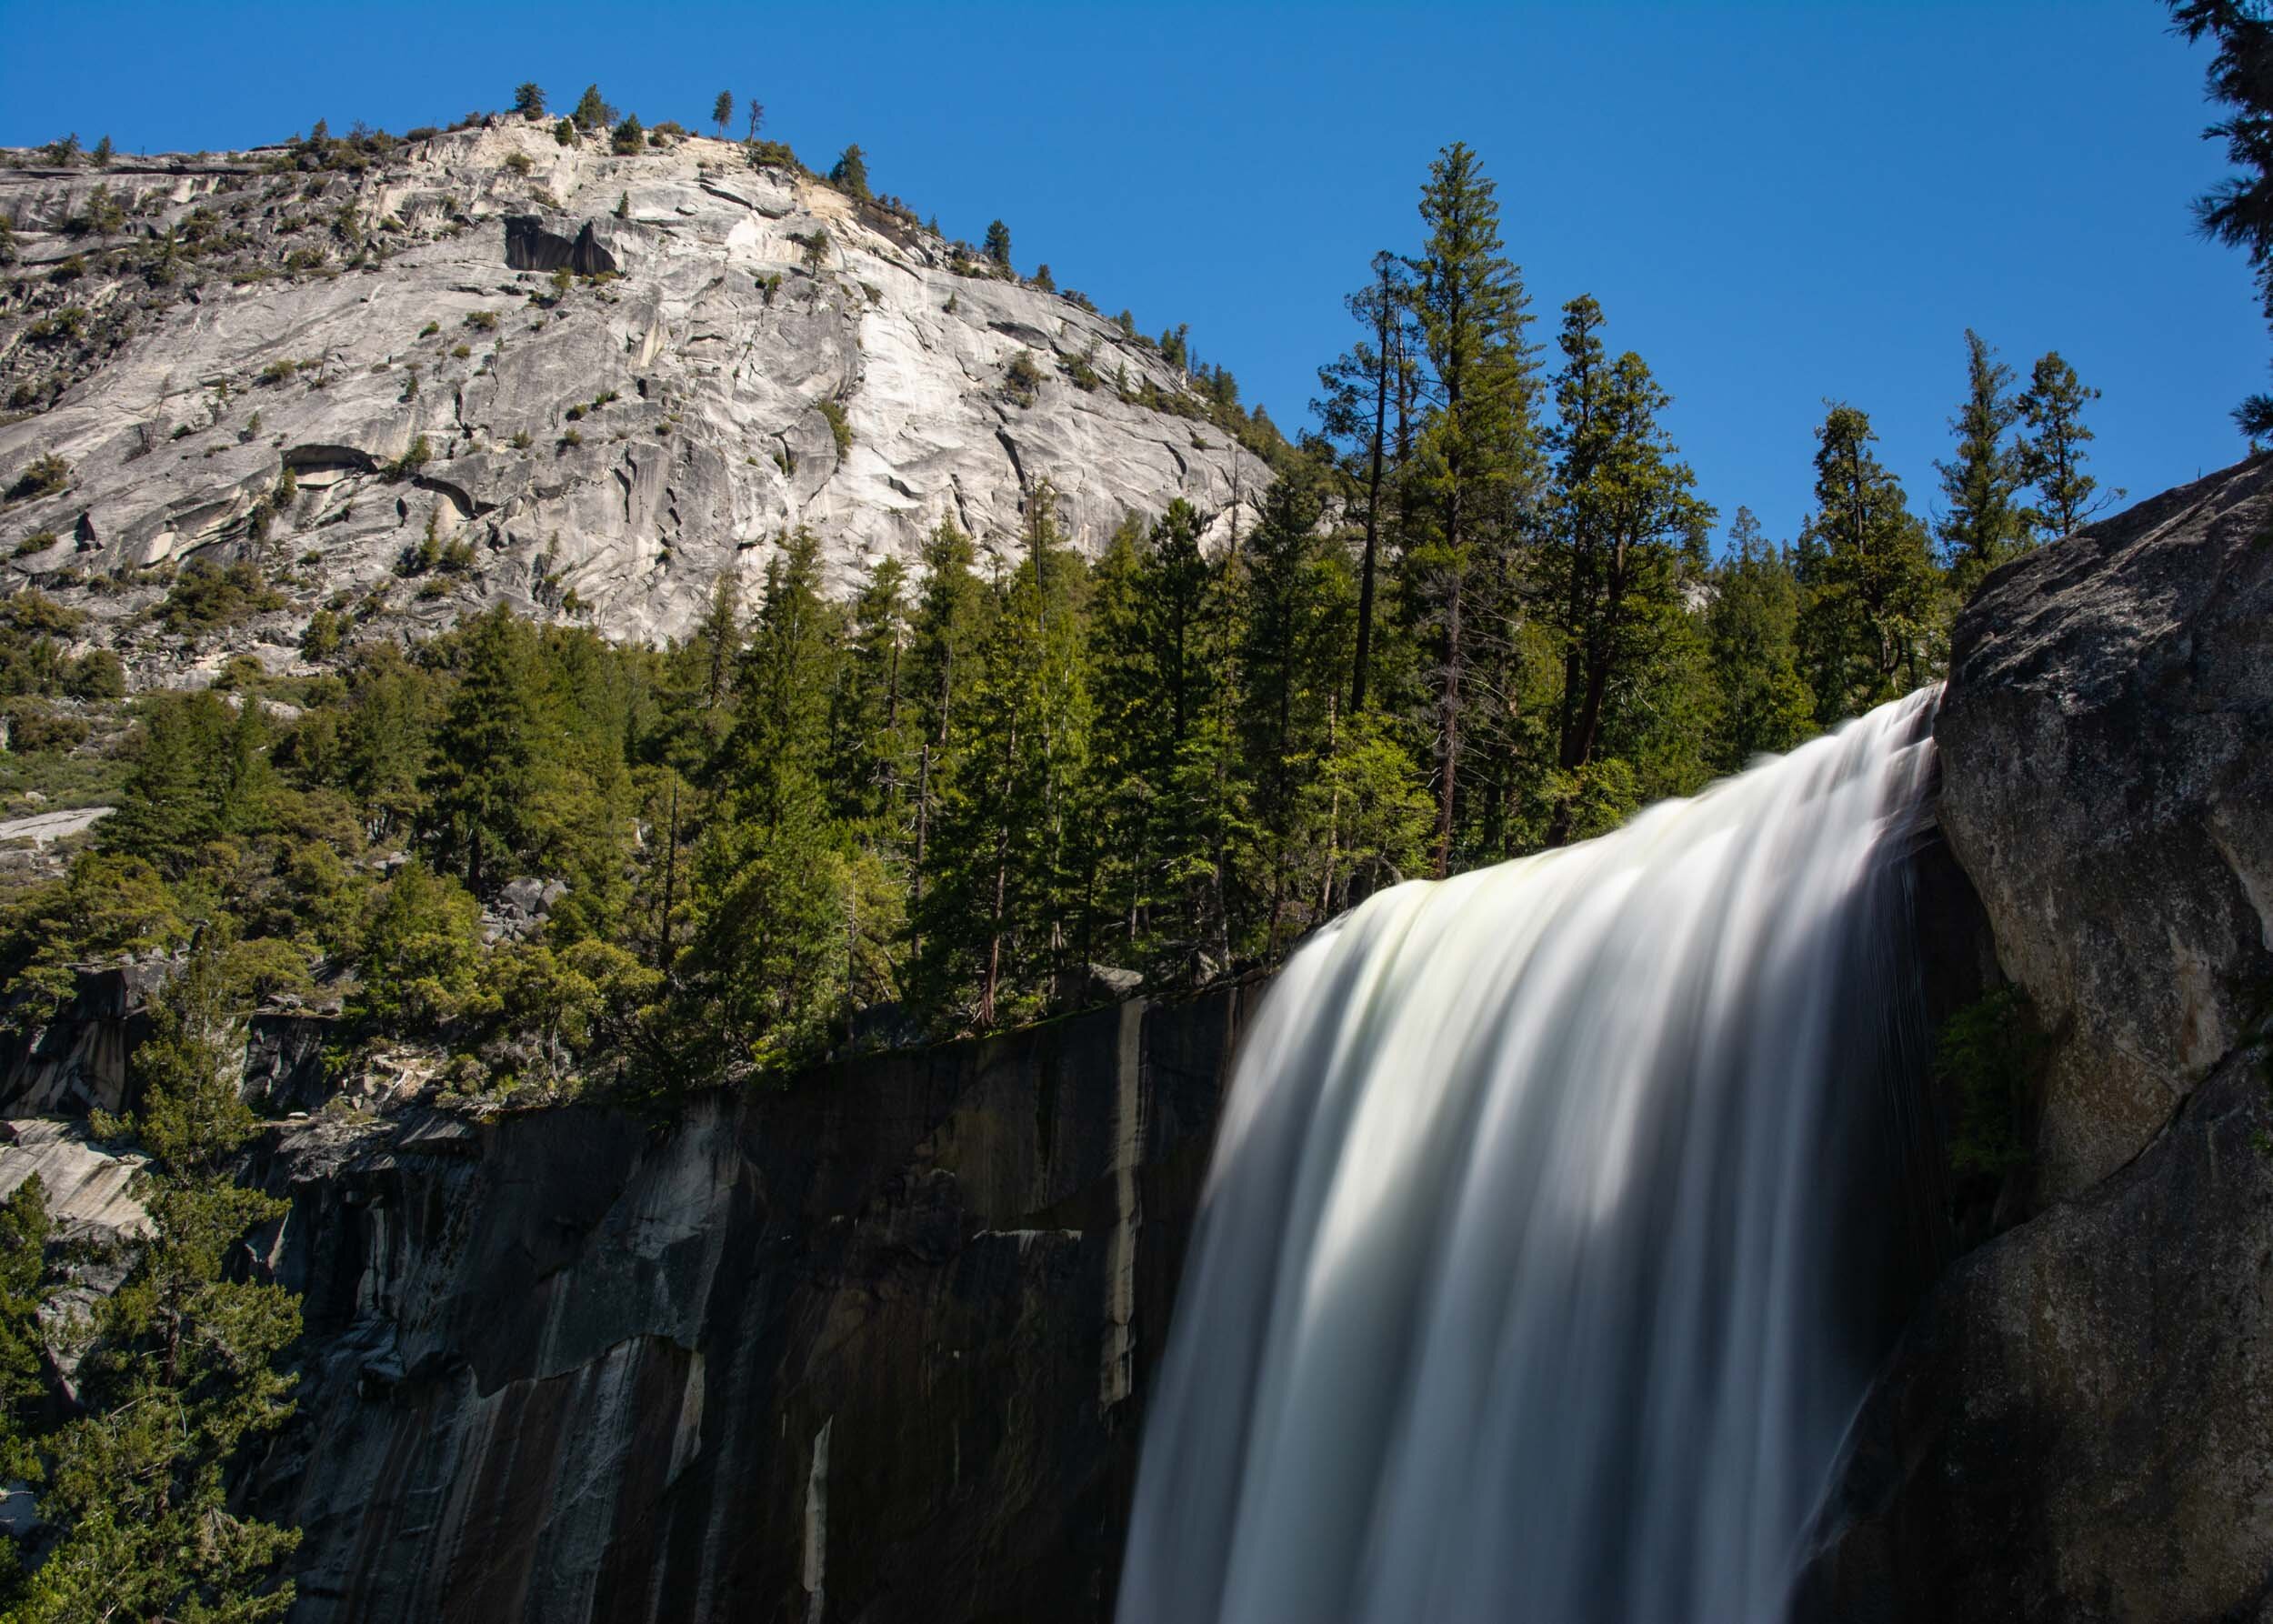
The third day is the longest one, and Panorama Trail has to be in the itinerary as it is a must! I was looking for the best light and started hiking the Mist Trail at 9am to Vernall Falls, then skipped Nevada Falls and took the John Muir Trail at Clark Point and all the way up to Glacier Point! It’s a 10 mile hike and after resting a little bit I connected this trail with the 4 Mile Trail to get down to the village. The views were breathtaking, the Panorama and 4 Mile Trail cannot be skipped! Once down, it is 1 mile of walking to the visitor center to get to the car/bus. Total miles of the day: 15.

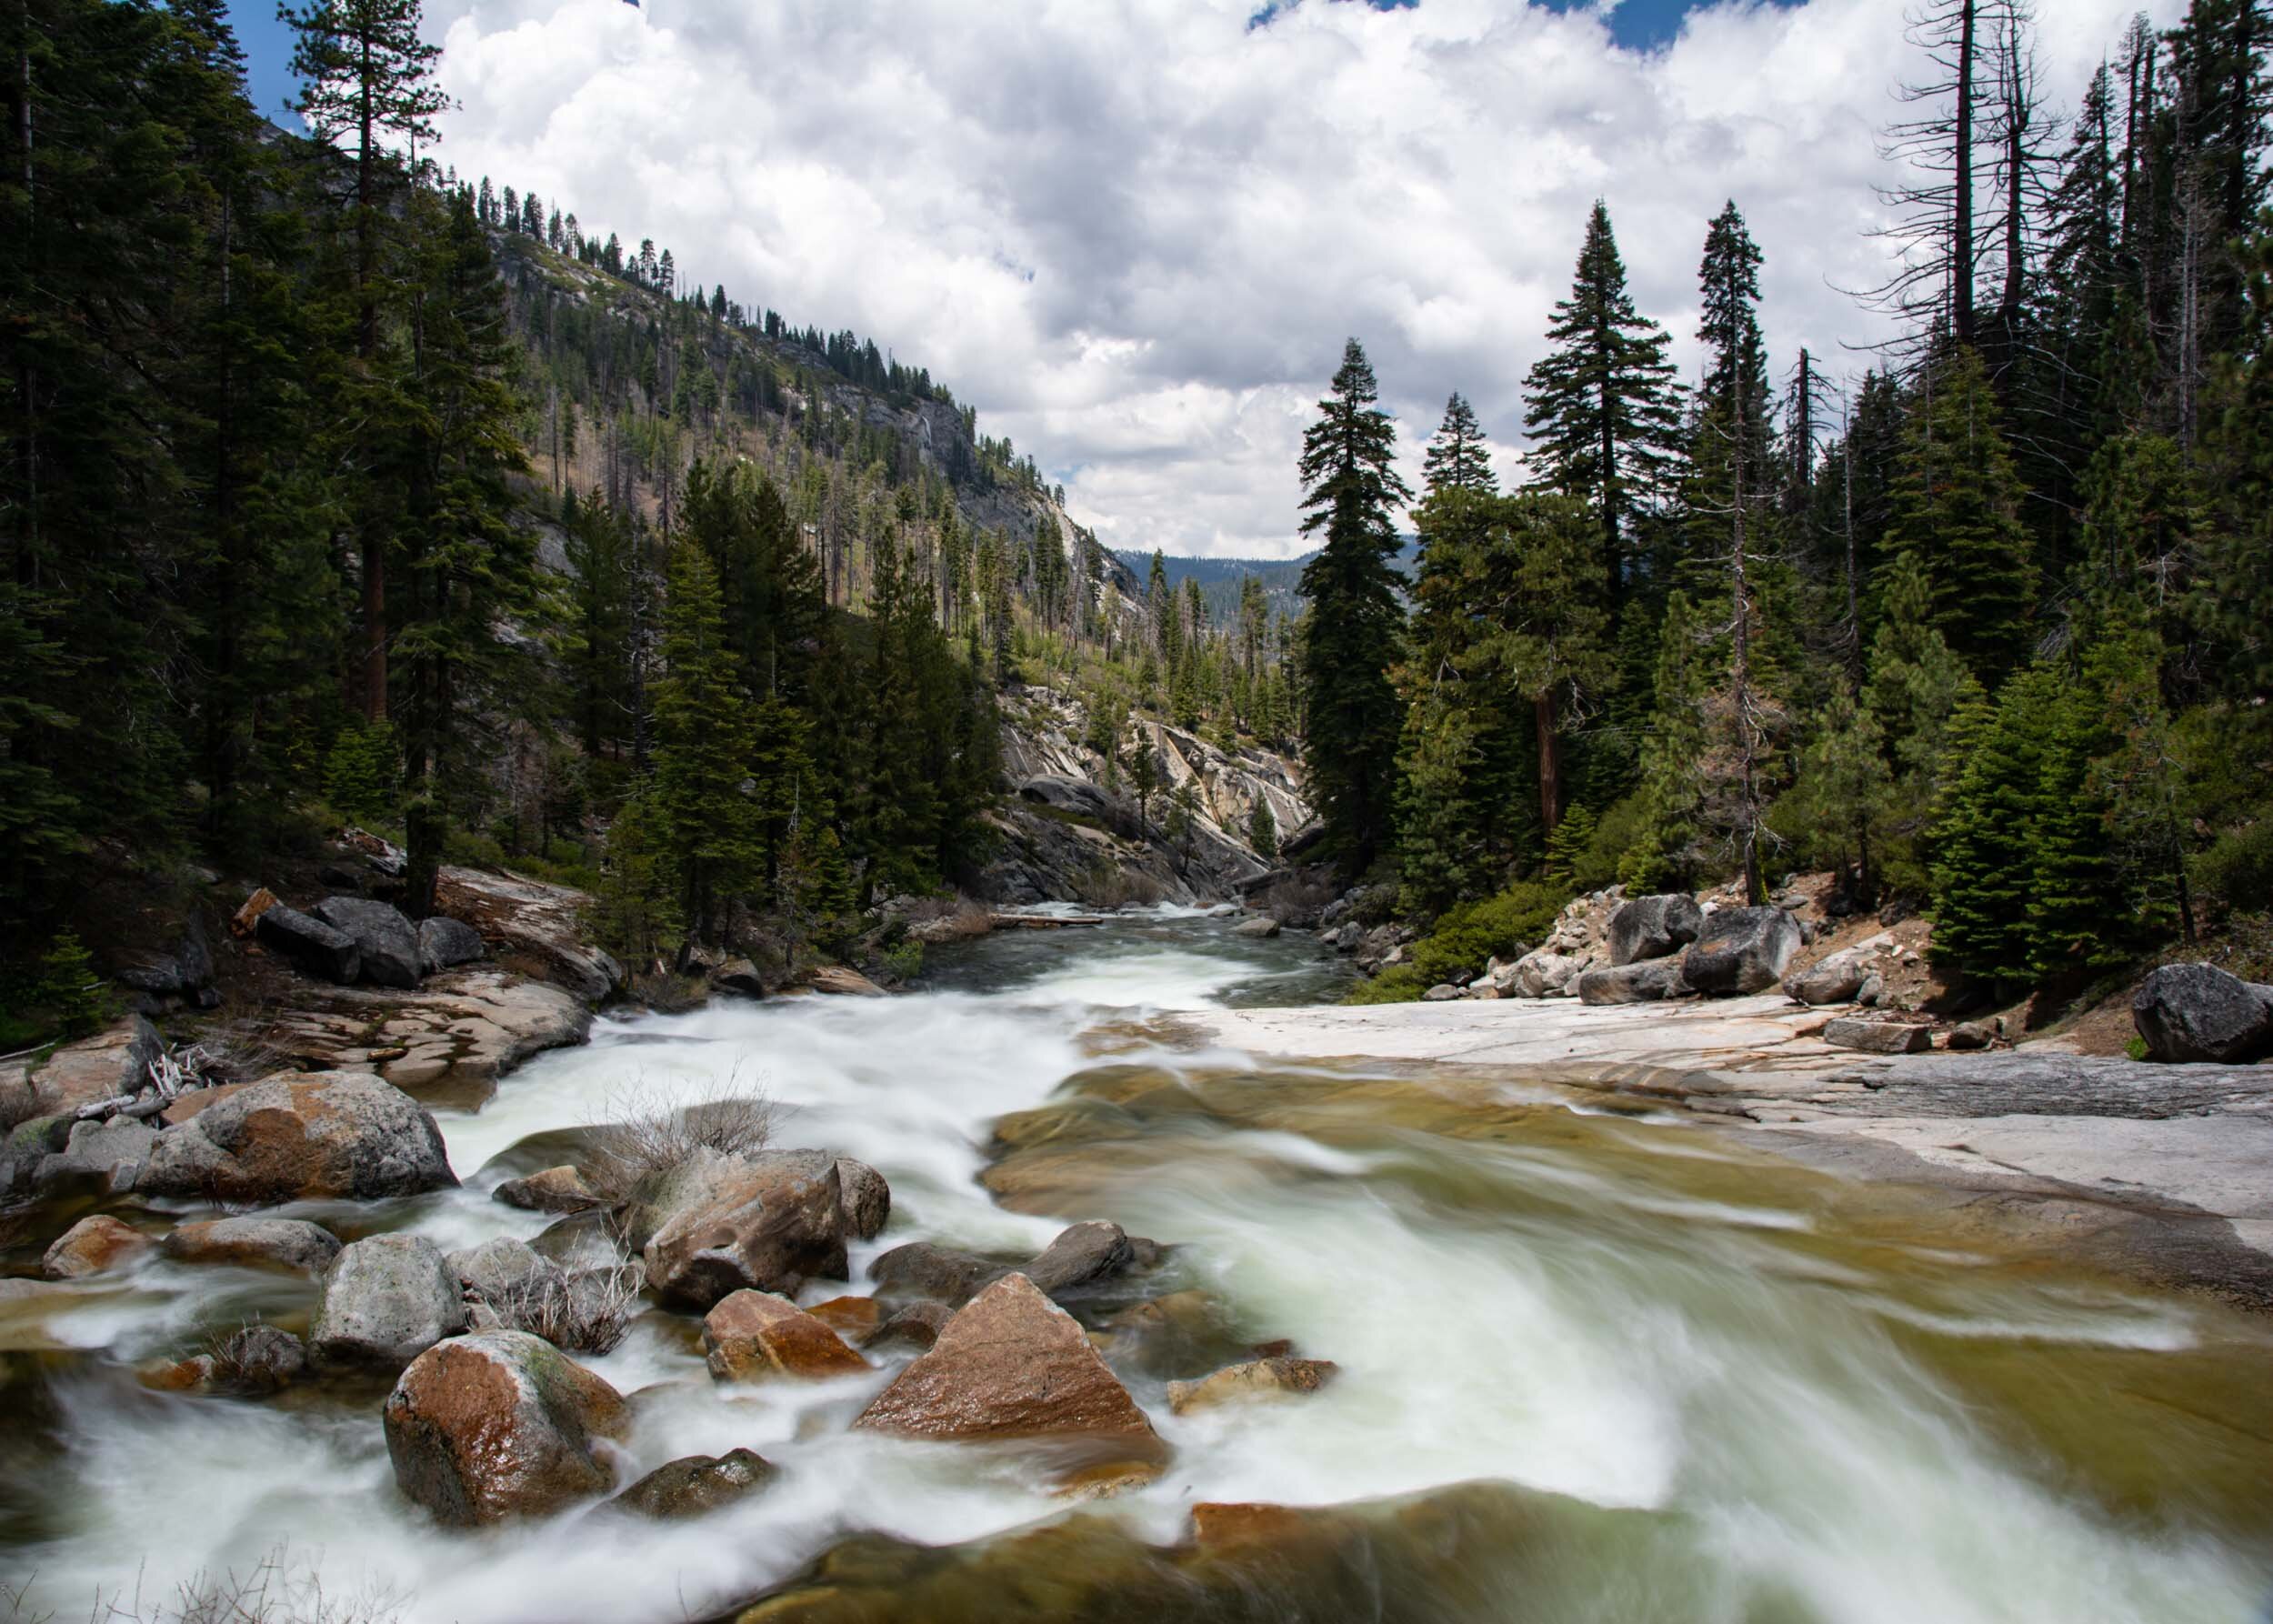
The fourth and last day is a short day as the return drive is 4 hours and after the strenuous hikes in the last three days, something more easy can be done during the morning. I wanted to explore other parts of Yosemite and did the Ranchería Falls Trail, it’s a relatively medium distance hike but all flat. Alternatively, walking around the valley is also a nice plan during the morning and have a picnic.

I had more than four days and as I haven’t been to San Francisco before, I explored the city and drove to Big Sur for some hikes (I recommend the Edwolsen Trail, but it isn’t well maintained after the fires and some fallen trees are on the way), saw California Condors and stopped by Año Nuevo State Park to see the Elephant Seals! I’d recommend 3 days for Big Sur and 2 days for San Francisco. A very active 9-day vacation covering three great places in the West Coast!


My journey with photography equipment… How I got to have my current camera and lenses

Whether you are using Nikon, Canon or any other brand, this article can still be very helpful as it goes through how I took decisions on getting my equipment and not about models of each brand. In my opinion, the first step is to define where do you want to focus on in photography: portraits, landscapes, wildlife, and it goes on… The first set of photography that I had was the Nikon D7100 + Nikon 18-140mm f/3.5-5.6 which was a good all around set.

When I was getting into wildlife photography I wanted to keep my equipment flexible enough to avoid changing lenses all the time, carrying too much weight and not spending too much money from scratch. That’s how I got my first “telephoto”, a Tamron 70-200mm f/4.0-5.6, which felt like a big upgrade from the Nikon 18-140mm as it had much more reach. It was convenient to not constantly change lenses when I was traveling and if I needed a wide angle lens for landscapes I used my other lens: the Nikon 18-140mm (which I upgraded to a Sigma 17-50mm f/2.8 that I still have to get better shots of landscapes).

After a while I wanted to get closer captions of wildlife and thought it would be a great time to see what was availalable in the market and get a new lens. That’s how after 1.5 years with the Tamron 70-200mm I got the Nikon 200-500mm f/5.6. A significant upgrade as I was able to get much closer to the subjects and opened so many opportunities for bird photography. I knew the aperture was a limitation in low-light conditions. But on a bright day the performance was stunning! This is an amazing lens for a budget of under $1,300 and thinking about an upgrade does not even come to my mind right now as I would really need to dig in my pockets (Nikon 70-200mm f/2.8: >$2000; Nikon 500mm f/4.0: >$12,000; Nikon 500mm f/4.0: >$10,000; Nikon 400mm f/2.8: >$12,000).

The Nikon 200-500mm f/5.6 lens fulfilled everything I was looking for in a telephoto lens, but the main challenge was getting sharp and luminous images in low light conditions. I started paying more attention to ISO performance of the camera and the buffer (time it takes until images are processed in the camera and written in the memory card). That’s when I started looking at my camera (Nikon D7100) as a burden to take better photos: I needed a better ISO performance and I needed a camera with better buffer (the Nikon D7100 was taking over 10 seconds to store a series of raw images in the memory card). As you can imagine, 10 seconds is an eternity when taking wildlife photos and I couldn’t lose time while my camera was processing the images. That’s when I got the Nikon D500, a big improvement from the Nikon D7100 as it has much better autofocus, ISO performance, buffer and quick access buttons to avoid spending too much time changing camera settings.

As a last comment, when taking wildlife photography the camera needs to be stable. Carrying a big lens (Nikon 200-500mm: 2.3kg) and camera (Nikon D500: 0.8kg) for hours will be a great workout, but not good results if I needed sharp images! Having a tripod or a monopod is as important as having a great camera/lens.

A few things to keep in mind when getting equipments for wildlife photography:

Lenses

  1. How many lenses to carry (changing lenses constantly increases the chance of dust getting in the sensor). Having a wide angle and a telephoto is more than enough for me.

  2. Autofocus performance

  3. Image stabilization

  4. Maximum aperture (this is important in low light conditions and bokeh)


Camera

  1. Frames per second (the higher the better to capture actions of wildlife)

  2. Buffer (camera has to be fast to not miss an important action)

  3. ISO performance (key element for low light conditions. I always check reviews of other photographers to see what’s their preferred ISO range)

  4. Megapixels (important for image quality when printing!)

  5. Number of autofocus points (higher flexibility of focusing on subjects in the image)

  6. Customizable quick access buttons (very helpful to change settings quickly)

Enjoy shooting!